

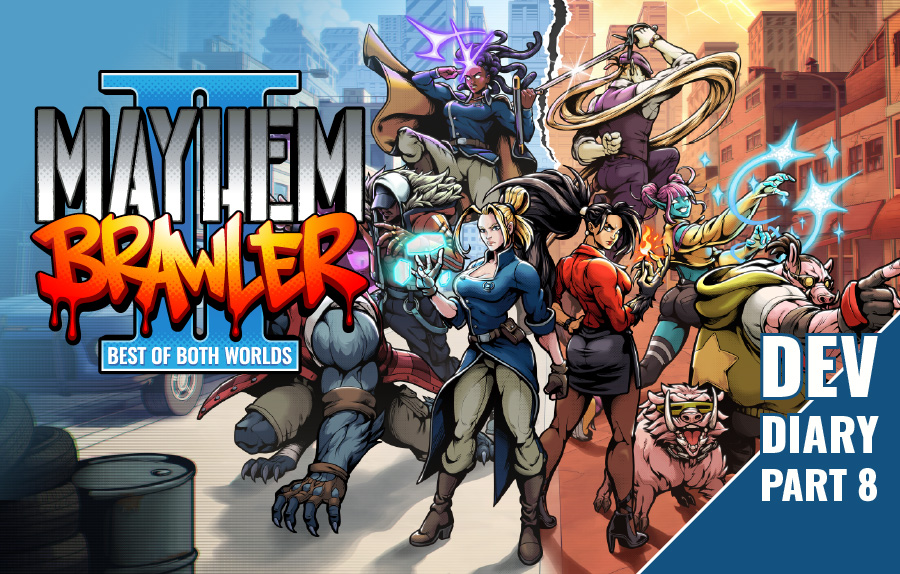
When designing a game’s cover art, it’s important to take a deep breath. The cover serves as the game’s first introduction to the outside world and will remain so for months to come.
To be successful, it is not enough to have an impressive cover art and logo. The design should also be able to adjust to different frames quickly. When launching a game, the cover art is required in various sizes, including horizontal (16:9), vertical (9:16), or square (1:1). To ensure the best presentation of your cover, it is crucial to optimize it for each platform where it will be displayed.
1 – Briefing
Based on lessons from the Mayhem Brawler‘s cover art projects, I had a clear vision from the beginning of the Mayhem Brawler II: Best of Both Worlds cover.
To begin with, I created a briefing:
- The cover art should feature characters from two different timelines in the exact location.
- All eight playable characters should be grouped and paired according to their respective timelines and pose together.
- Past and present characters should be distinguishable in their poses. If one person faces one direction, the other should face the opposite.
- Each character should be positioned symmetrically with their counterpart and be able to be paired together when needed, making them usable as promo art individually.
- All of this should be centered on the background of Mayhem City, which is split in half by a time difference.
- The environment should also be divided down the middle, showing two different timelines.
- The design requires a cross-section of a suburban neighborhood from two different time periods to be in the foreground. In addition, in the background silhouette, there should be a district quarantined under a dome during a zombie outbreak that occurred 20 years ago, as stated in the story.
2 – Draft
After taking all of these criteria into consideration, I have created a draft that I believe meets the requirements.
At first, I intended to complete the cover on my own. However, later on, I wanted this to be a memorable experience for the art team, something they could remember even years later. After all, multiple people were putting effort into completing each and every art asset for the project. The cover was no different. So, I divided the work within the team before moving forward.
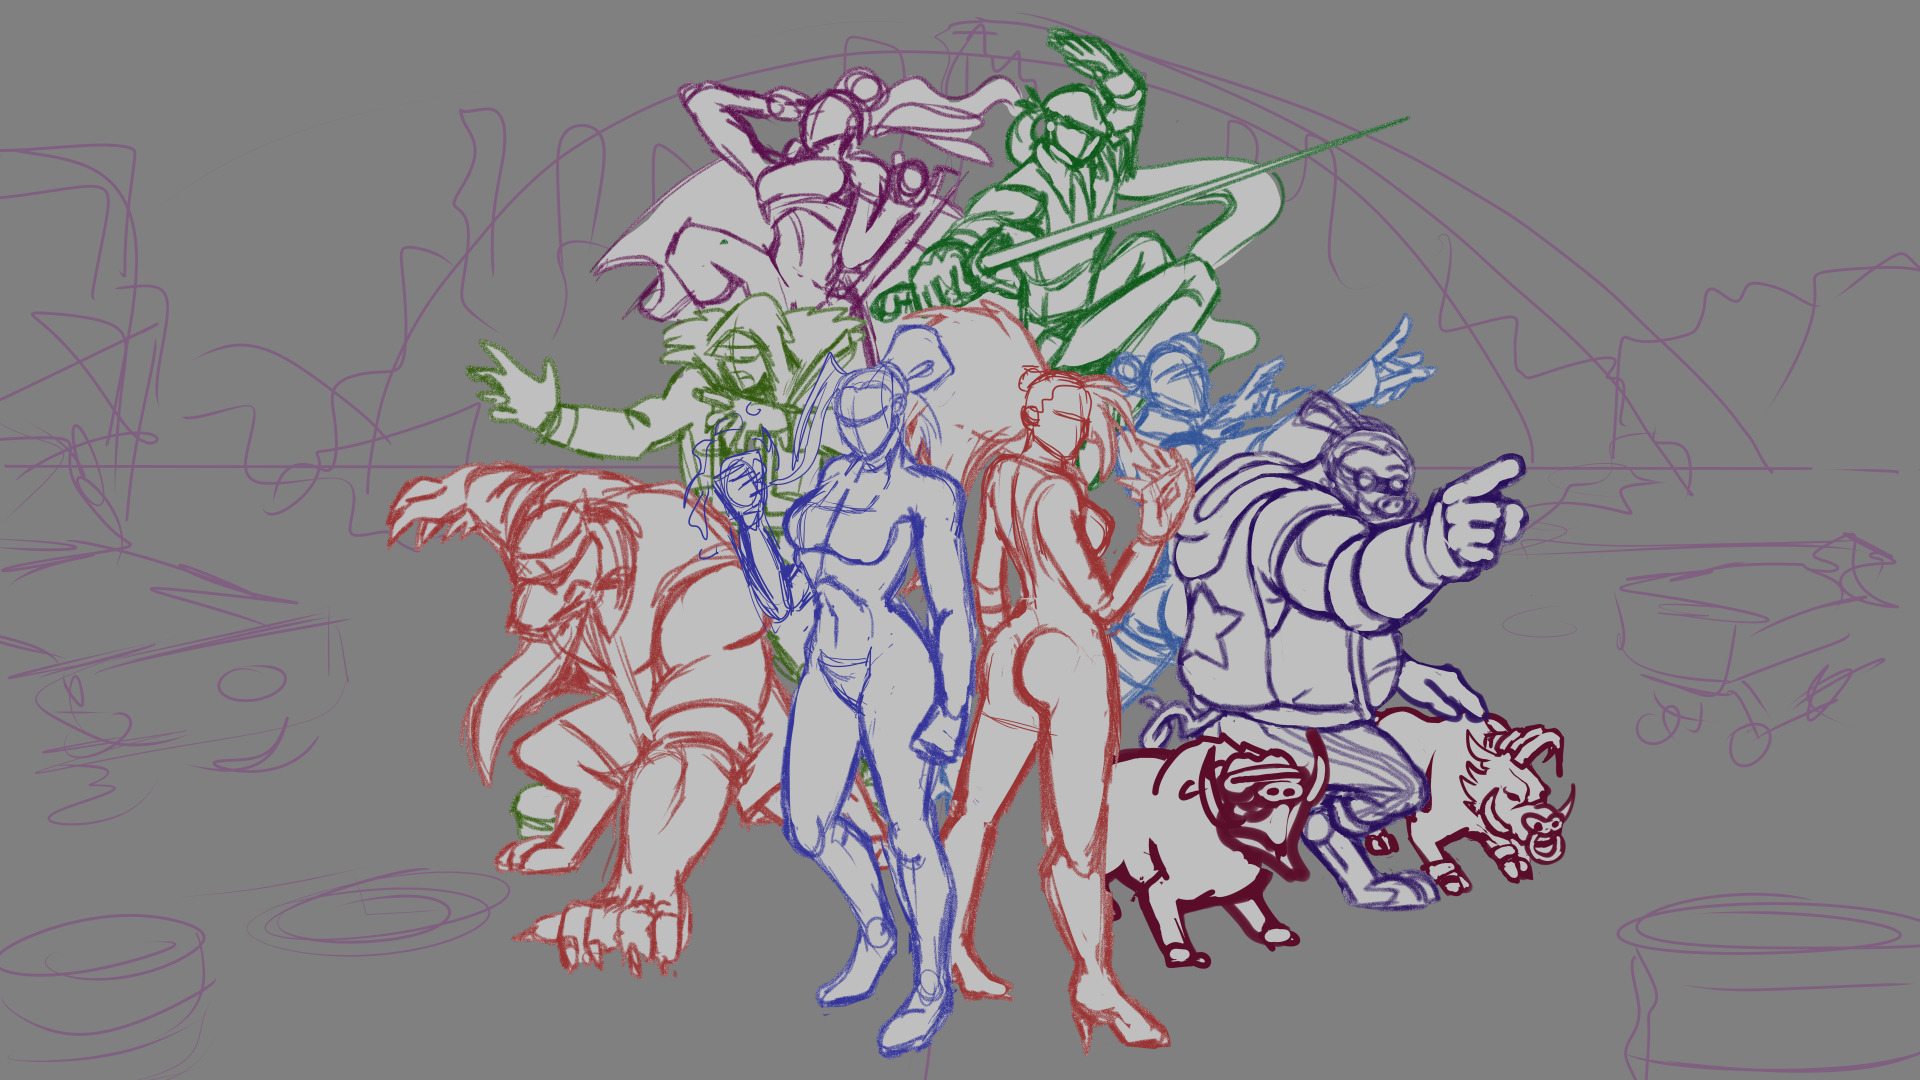
1- Draft by me
3 – Characters – Pencil
Dilailah, our character concept artist, took on the pencil stage. Since she prepared the model sheets for most of the heroes (except Stellar, She Wolf, and Apex Hunter), she was already familiar with the characters.
Using the draft as a reference, Dilailah organized the poses and enhanced the sense of depth. She remarkably succeeded in adjusting Voivoda’s pose, located at the far right back, to better align with the briefing.
3- Pencil by Dilailah
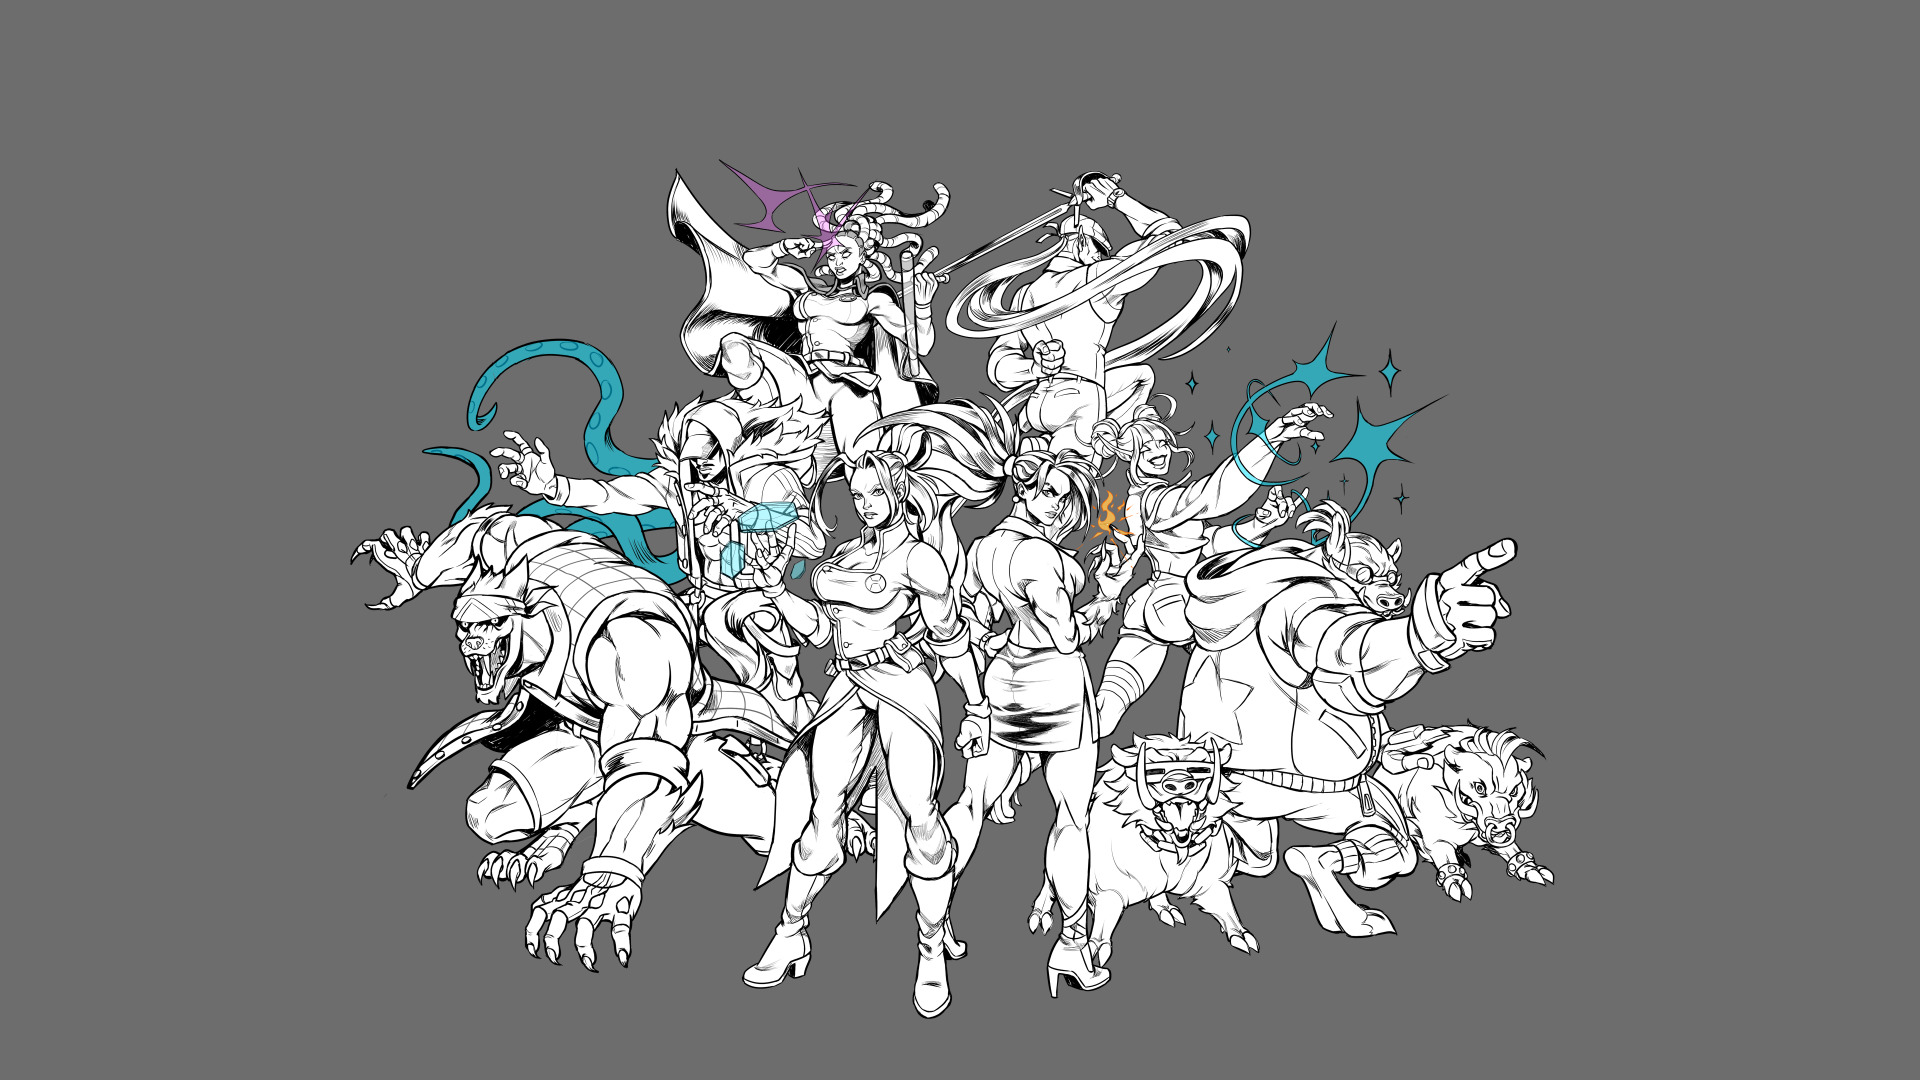
4 – Characters – Ink
For the ink stage, we decided to entrust it to Utku, one of our character animators, due to his passion for comic books.
Also, Utku corrected minor anatomy errors while adjusting the black balance.
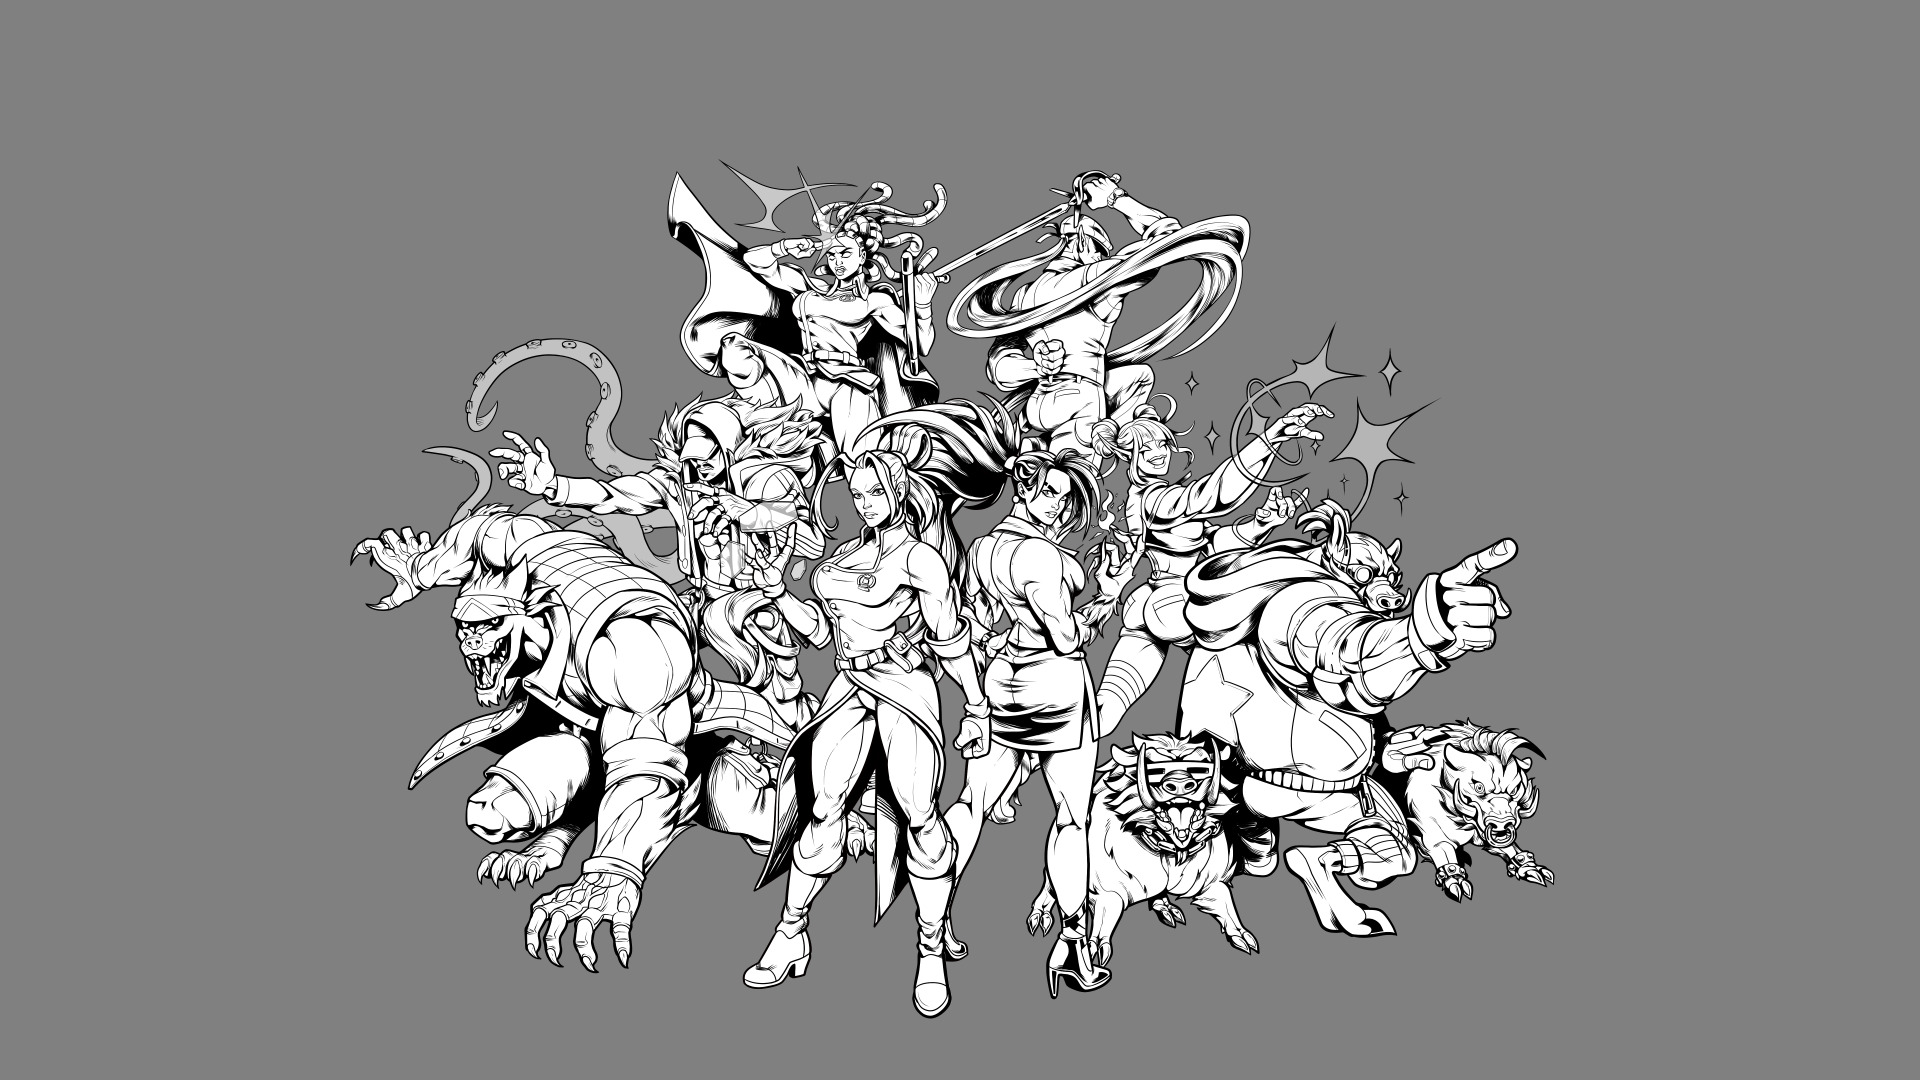
4- Ink by Utku
5 – Background – Pencil & Ink
Background work was also progressing simultaneously with the characters. Kirman, our background concept artist, completed the task’s pencil and ink stages.
In addition to the briefing, we included objects related to the game’s story and gameplay, such as a patrol car, trash can, and shopping cart used by homeless people.
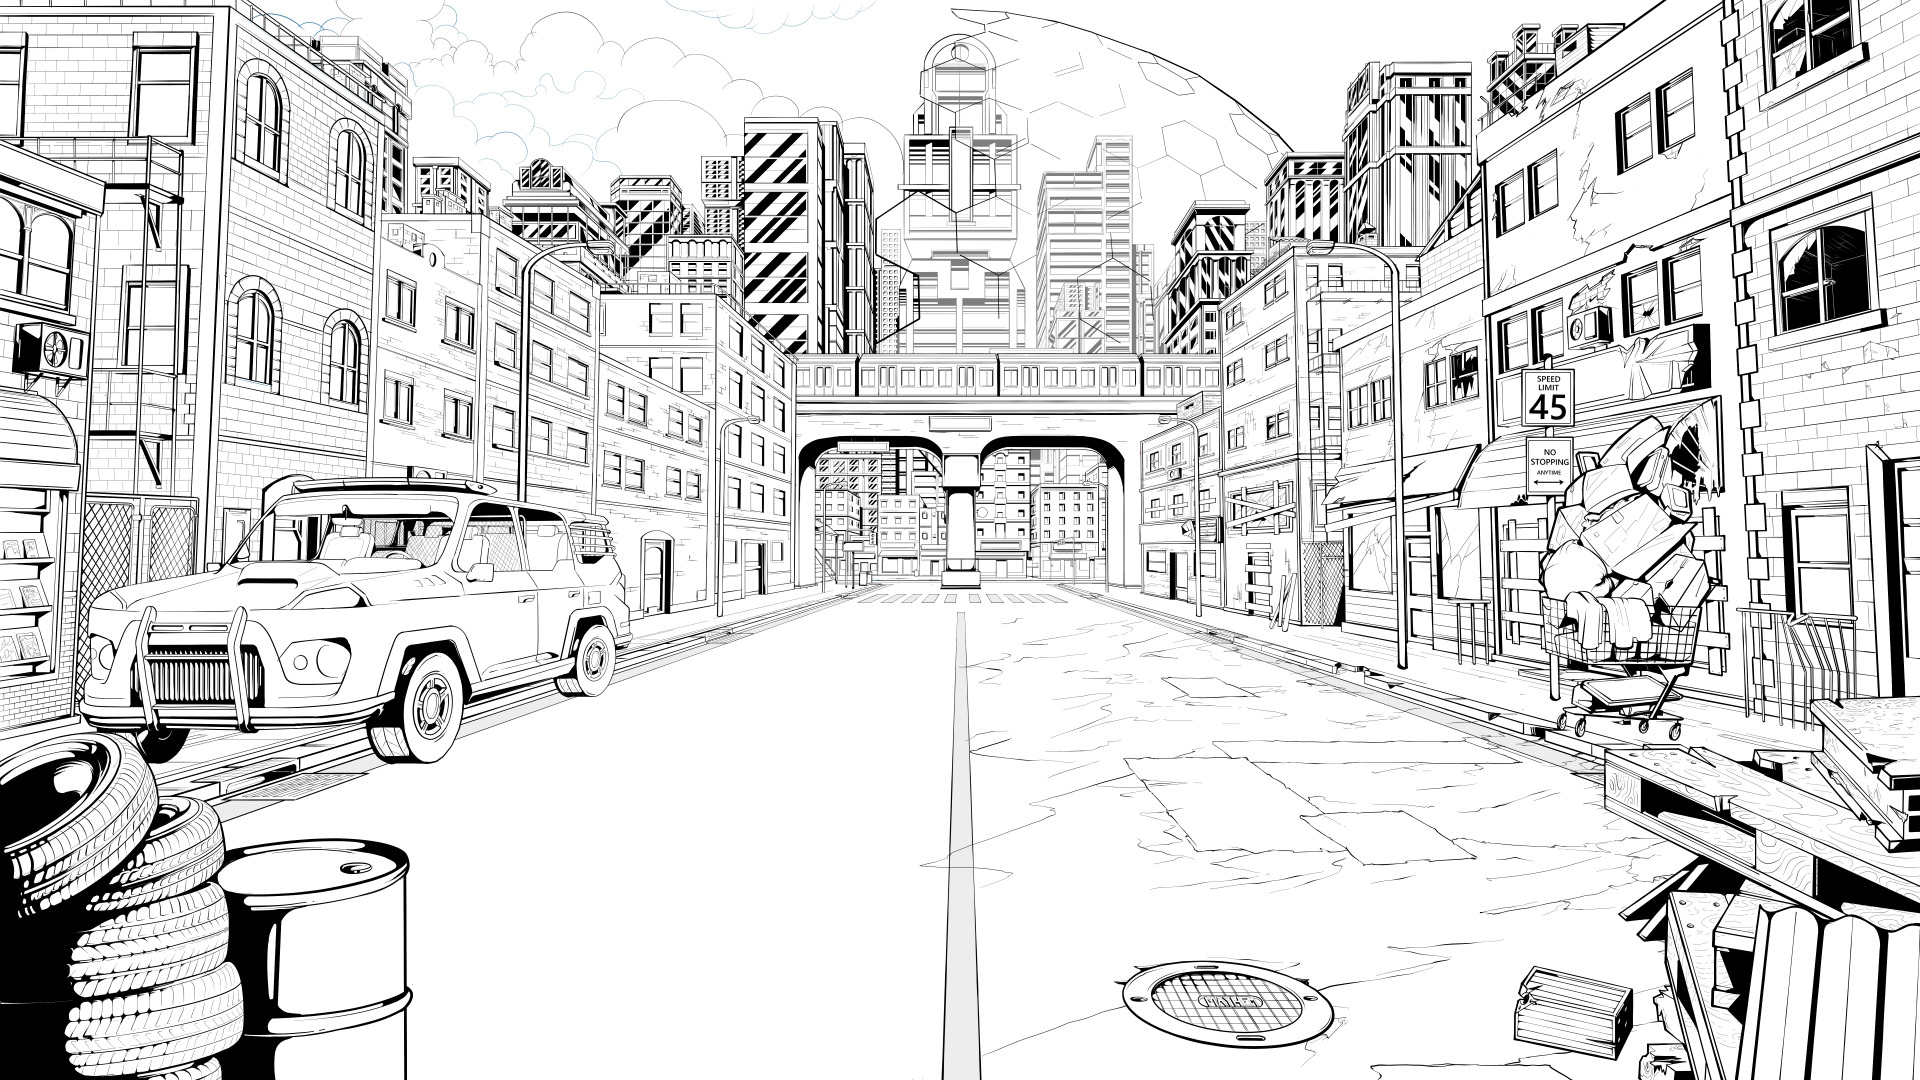
5- Background pencil & ink by Kirman
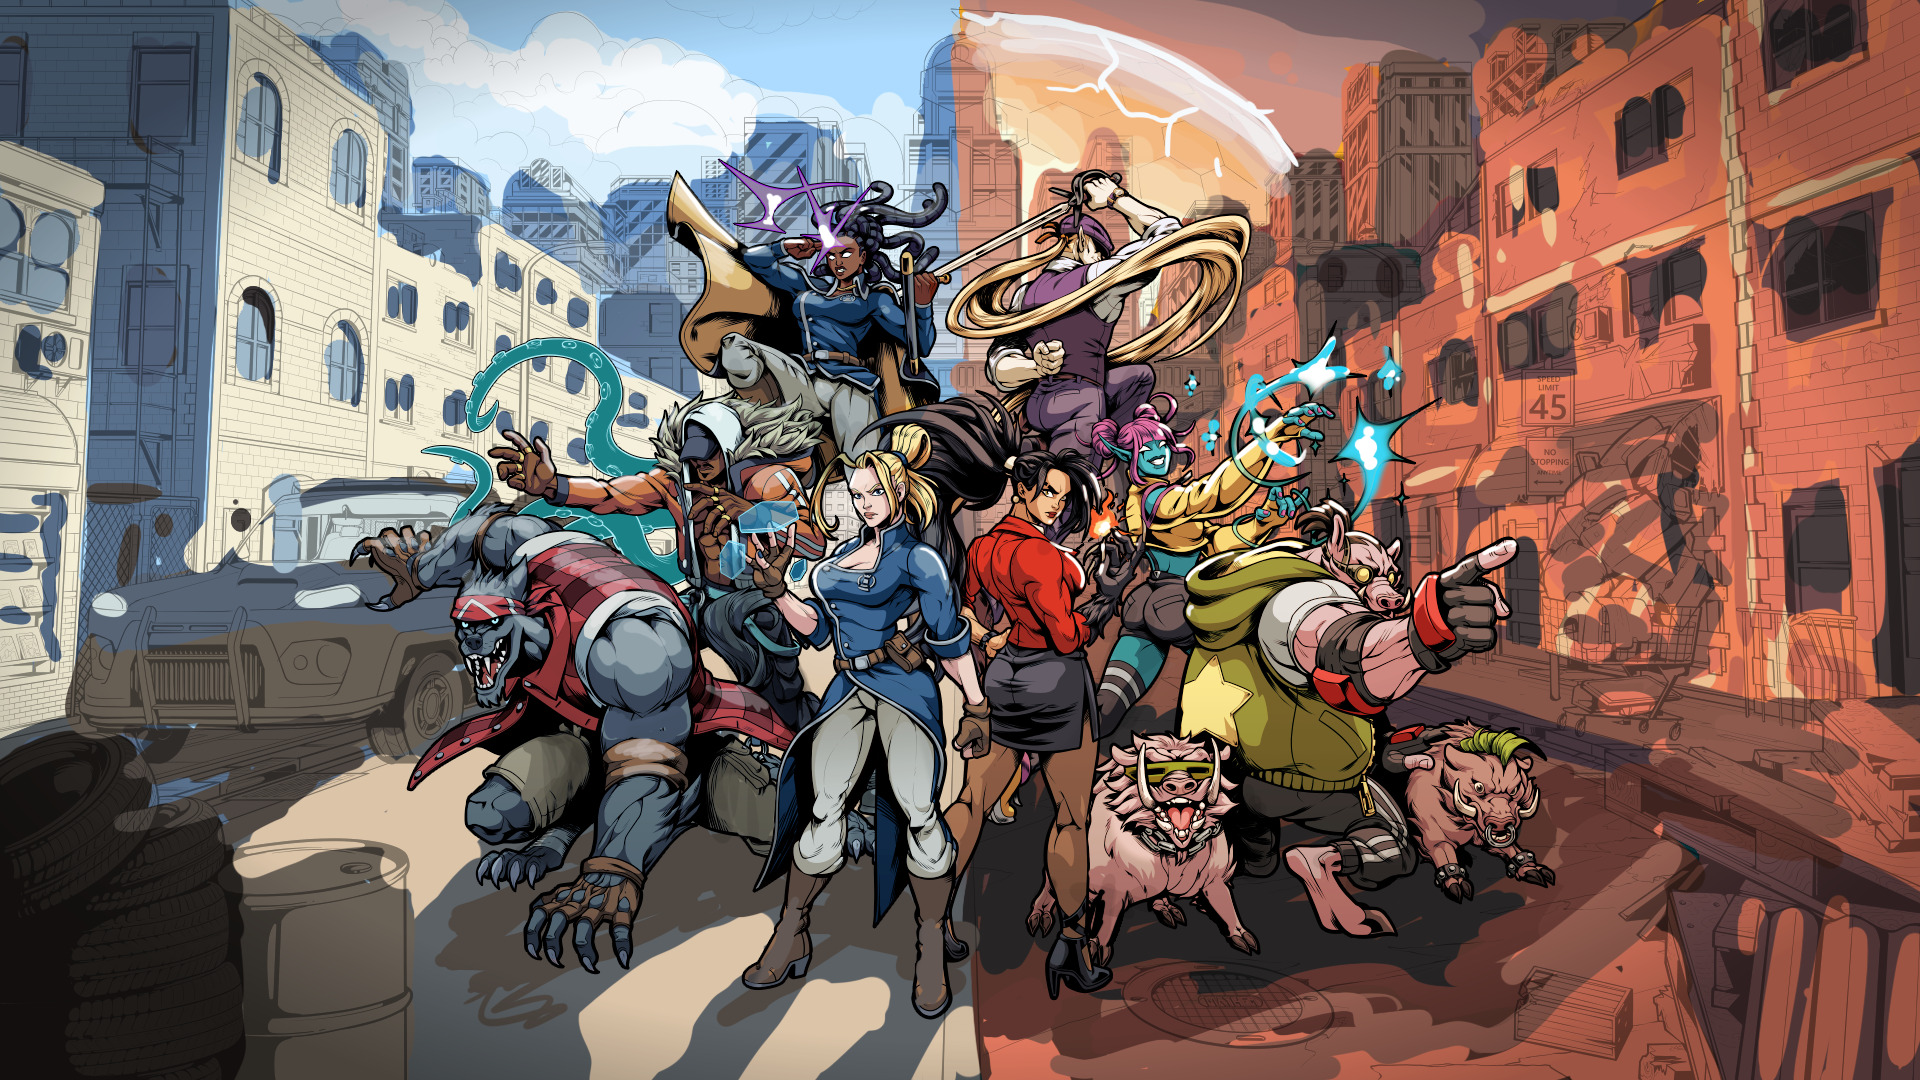
6 – Characters – Color
After the ink phase, our character animators Yasin and Musa took over the coloring as Yasin colored the present and Musa colored the past. Since Yasin’s first character was She Wolf and Musa’s was Stellar.
The progress of this stage was relatively quick as the character model sheets were already prepared.

6- Character color by Yasin and Musa
7 – Mood
While the background coloring work was continuing, at some point, I had to step in again because they needed clarification, especially about the color palette of the background.
For this purpose, I first made a detailed source scan. Then, I determined the mood by blending my collected references and painting over the drawings.
7- Mood by me
8 – Background – Color
Emirhan, one of our character animators, completed the background painting as follows within the palette I determined in the previous stage:
Initially, we were uncertain about the level of detail in the rendering. However, we were relieved in the later stages when it became clear we were on the right track.

8- Background color by Emirhan
9 – Rendering
When it came time to merge the background with the characters, our 3D artist Rabia took charge.
While rendering the lighting and shadow relationships between the characters and the environment, Rabia ensured their placements were accurate.
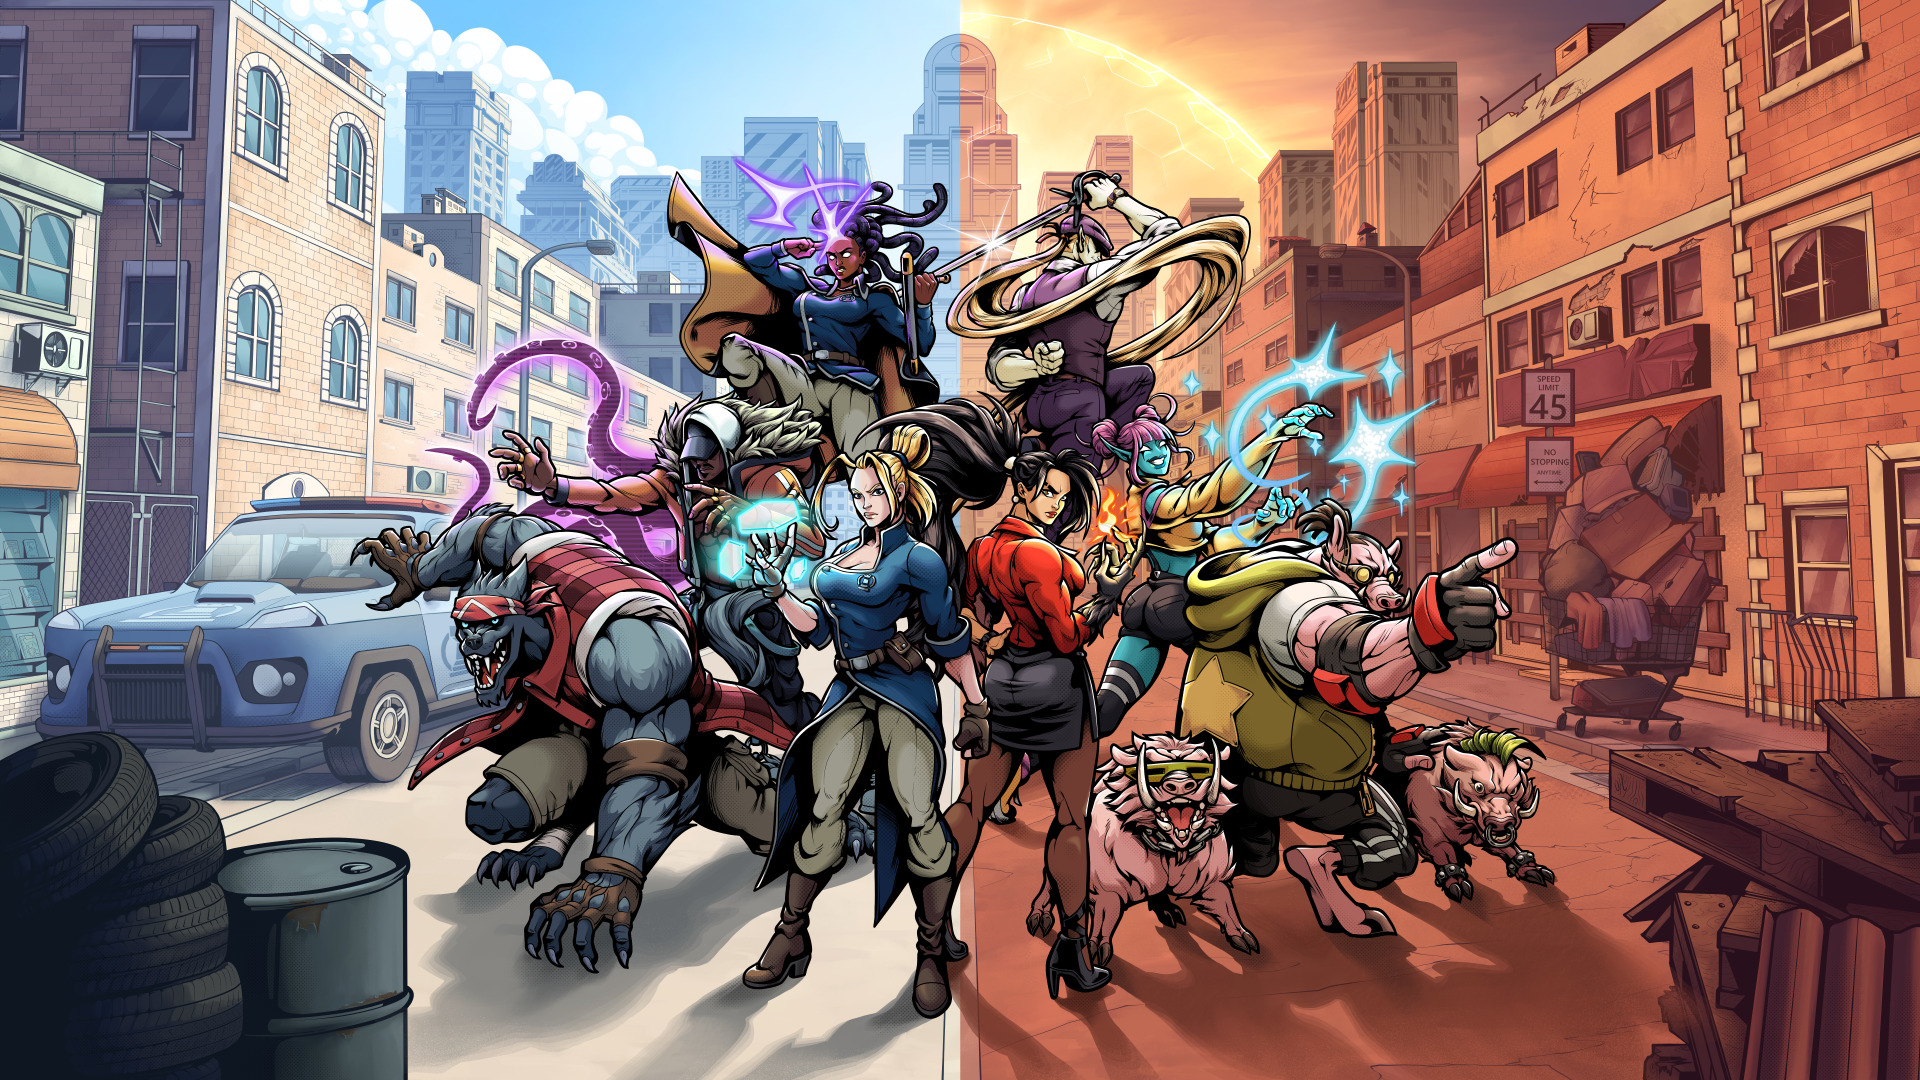
9- Render by Rabia
10 – Final Touch
As we were nearing completion, we all came to an agreement that some final touches were necessary. I took on the task and added a rift between the two time periods and a CRT effect to the background. In conclusion, I made some color corrections and finished the job.

10- Final touches by me
We are happy with the result. We hope you like it too. The only thing that remains is to finish the remainder of the game.
— Your friendly neighborhood developer, Serkan Özay